Easy 10-Minute Poha Snack | Quick, Tasty & Perfect Evening Snack

45 Mins

3-4 People

05 Mins
Easy 10-Minute Poha Snack — A Quick, Tasty & Perfect Evening Snack
Here's something I love about poha — it is one of those ingredients that asks very little of you and gives you so much in return. I have been cooking for years, and I still find myself reaching for poha on mornings when I need something quick, light, and genuinely satisfying. The best part? This recipe is literally ready start to finish in 10 minutes — and I really do mean 10 minutes, not the kind you see on the internet that somehow turns into 40.
This easy 10-minute poha snack is something I made because people kept telling me they wanted a no-tension breakfast — something they could pull together without a long list of steps. So I created this poha snack recipe that comes together like a soft, crispy uttapam — golden on the outside, fluffy on the inside, and full of real flavour. Whether it is your morning breakfast, an evening snack with chai, or a quick bite between meals, this one is always a good idea.
Ingredients of Easy 10-Minute Poha Snack
Portions/Servings: 3–4 Pax
Preparation Time: 05 Mins
Cooking Time: 45 Mins
Ingredients of Easy 10-Minute Poha Snack
- Poha (thick) — 2 cups
- Water — as required
- Onion, chopped — 1 pc
- Capsicum, chopped — ½ cup
- Green peas — ¼ cup
- Tomato, chopped — 1 pc
- Ginger, chopped — 1 tsp
- Green chilli, chopped — 1 tsp
- Coriander, chopped — 1 tbsp
- Rice flour — ½ cup
- Besan — ½ cup
- Salt — 1 tsp
- Water — as required
- Oil — 1 tsp
Instructions of Easy 10-Minute Poha Snack
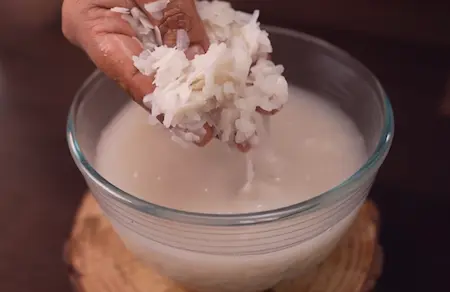
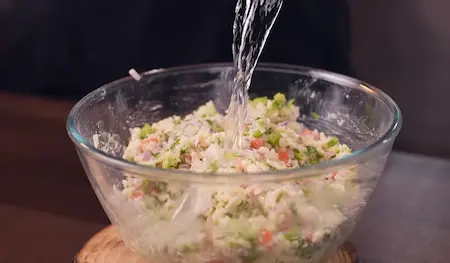
Step 1: Soften the Poha
Wash thick poha once or twice with water and drain immediately. Transfer to a bowl and let it rest for a few minutes so it softens without becoming mushy.
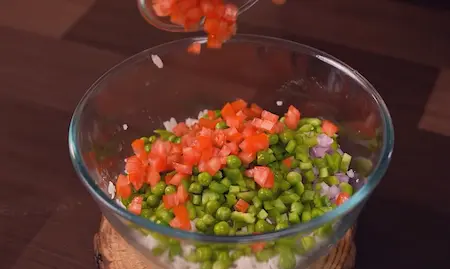
Step 2: Add Fresh Vegetables
To the softened poha, add chopped onion, capsicum, tomatoes and green peas. Mix gently so the vegetables are evenly distributed throughout the poha.
Step 3: Add Aromatics & Herbs
Add chopped ginger, green chilli and fresh coriander. Mix well to enhance flavour and give the mixture a fresh, slightly spicy taste.
Step 4: Prepare the Batter
Add rice flour and besan to the mixture. Pour water gradually and mix to form a thick, spreadable batter similar to pancake consistency. Ensure everything binds well without making it too runny.
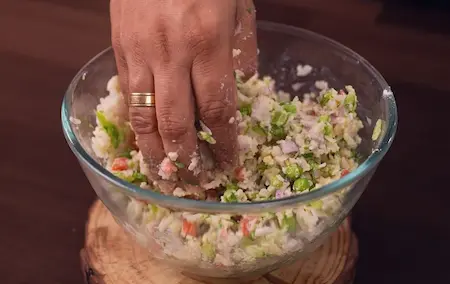
Step 5: Season the Mixture
Add salt and mix thoroughly so the seasoning is evenly combined. The batter should hold shape when dropped on the pan.
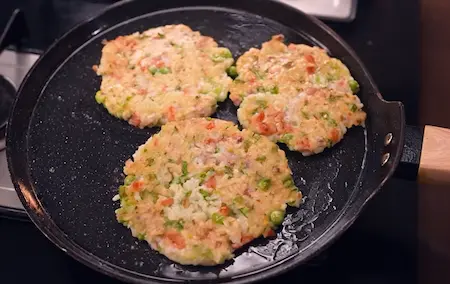
Step 6: Cook on Tawa
Heat a flat tawa and grease it lightly with oil. Spread a portion of the mixture like a thick pancake. Cook on medium heat until the base turns golden and crisp, then flip and cook the other side.
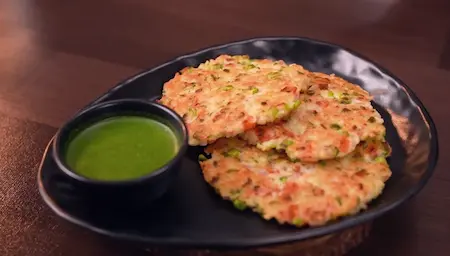
Step 7: Serve Hot
Cook until both sides are nicely crisp and cooked through. Serve hot with green chutney for a quick, healthy and tasty snack.
About This Easy 10-Minute Poha Snack
What I love most about this poha snack is how honest it is. There are no complicated techniques, no long prep lists, and no fancy equipment needed. The only time you actually spend is chopping a few vegetables — onion, capsicum, ginger, green chilli, tomato, and some fresh coriander. Once that is done, you are basically done.
One thing I always tell people is to use thick (mota) poha for this recipe, not the thin kind. Thin poha is great for making regular poha, but for this snack, the thick variety gives you that beautiful texture — soft on the inside and a little crispy on the outside, just like a good uttapam. I have tried it both ways and trust me, the thick poha version is in a completely different league.
After washing the poha, it naturally absorbs some moisture and becomes soft. I add rice flour and a little besan to the mix — that is what gives the snack its crispness when it hits the hot tawa. You do not need a long list of dry spices here. Just salt is enough, and if you want a little warmth, a pinch of garam masala does the job beautifully.
The batter needs to be slightly flowing — not too thick, not too runny — so that when you spread it on the tawa, it cooks evenly and gets that lovely golden crust. Cook it on low-medium heat for about 3 to 4 minutes on each side and you will have crispy poha uttapams that look and taste like something that took much longer to make.
This is what I like to call a no-tension breakfast. Morning stress about what to eat? Poha snack. Guests arriving and nothing ready? Poha snack. Evening hunger hitting hard? You already know the answer.
Cooking Tips for the Perfect Poha Snack
Always wash the poha before using it.
Poha is hand-processed and can carry dust and impurities. I always wash it thoroughly under running water before using. It takes 30 seconds and makes a real difference to the final taste and hygiene of the dish.
Use thick (mota) poha, not thin poha.
This is a non-negotiable tip for me. Thin poha turns mushy and falls apart. Thick poha holds its shape after soaking and gives the snack a much better texture — crisp outside, soft inside.
Let the batter rest for 5 to 10 minutes.
After mixing everything together, let the batter sit. The poha needs time to absorb all the moisture properly. This resting step is what makes the final texture consistent and well-bound.
Keep the batter slightly flowing.
The batter should not be too stiff. A slightly flowing consistency means you can spread it on the tawa like a thin uttapam, which helps it cook evenly and get crispy on both sides.
Cook on low to medium heat.
High heat will burn the outside before the inside is cooked. Low to medium flame for 3 to 4 minutes per side gives you an even golden colour and ensures the snack is cooked through without being raw in the middle.
Add a little rice flour and besan for crispness.
This is the secret touch. A small amount of rice flour and besan in the batter adds structure and gives the snack its signature crispy outer layer. Do not skip this step if you want that perfect crunch.
Pairing Guide — What Goes Well with Poha Snack
Masala chai or ginger tea.
This is the most natural pairing for this easy 10-minute poha snack. The warmth and slight bitterness of a good masala chai cuts right through the soft, savory flavour of the poha uttapam. It is a classic Indian evening snack combination that never gets old.
Green chutney or coconut chutney.
A fresh green chutney made with coriander and mint works beautifully alongside this poha snack. If you prefer something milder, a simple coconut chutney is equally good and adds a slightly sweet contrast to the spiced batter.
Plain yoghurt or raita.
If you want to turn this into a slightly bigger meal, serve it with a bowl of fresh plain curd or a simple raita. The coolness of yoghurt balances the warmth of the ginger and green chilli in the snack very well.
Tamarind chutney.
A small drizzle of tamarind chutney adds a sweet-tangy note that elevates the snack without overpowering it. This combination works especially well as an evening snack when you want something a little more interesting.
Filter coffee or black coffee.
For those who prefer coffee over tea, a strong South Indian filter coffee or even a plain black coffee pairs very well with the light and savoury flavour of this poha snack recipe.
Frequently Asked Questions About Easy 10-Minute Poha Snack
1. Can I really make this poha snack in 10 minutes?
Yes, absolutely. I designed this easy 10-minute poha snack to be genuinely quick — not the kind of "10-minute recipe" that takes 40 minutes once you actually start. The only prep time goes into chopping the vegetables — onion, capsicum, ginger, green chilli, and tomato. After that, mixing and cooking is very fast. Start to finish, this poha snack recipe is 10 minutes.
2. Which type of poha should I use for this snack?
Always use thick (mota) poha for this poha snack recipe. There are two types of poha available in the market — thick and thin. Thin poha is used for making regular poha dishes, but for this particular snack, you need the thick variety. It holds its shape better after washing and gives the snack a much better texture — crispy outside and soft inside, just like a good uttapam.
3. Why do I need to wash the poha before using it?
Poha is hand-processed, which means dust and impurities can be present. I always insist on washing poha thoroughly before making this easy poha snack. It is a simple step that takes very little time but makes a real difference to the hygiene and taste of the final dish.
4. Why is rice flour and besan added to this poha snack?
Rice flour and besan are added to give the poha snack its crispiness. The rice flour creates a light, crispy outer layer when the batter hits the hot tawa, and the besan adds structure and helps bind everything together. Without these two ingredients, the snack would be soft throughout and would lack the satisfying crunch that makes it special.
5. Do I need to add any dry spices to this poha snack?
No, you do not need a long list of dry spices for this poha snack recipe. The fresh ingredients — ginger, green chilli, onion, and coriander — provide all the flavour you need. Just salt is enough. If you like a little extra warmth, you can add a small pinch of garam masala, but it is entirely optional.
6. How long should the batter rest before cooking?
After mixing the batter for this easy 10-minute poha snack, let it rest for 5 to 10 minutes. This resting time allows the poha to fully absorb the moisture in the batter. Skipping this step can result in uneven cooking, so it is worth the short wait even when you are in a hurry.
7. What consistency should the batter be for poha snack?
The batter for this poha snack should be slightly flowing — not too thick and not too thin. A flowing consistency means you can spread it on the tawa easily, just like you would with an uttapam batter. This ensures the snack cooks evenly and develops a nice golden, crispy crust on both sides.
8. On what heat should I cook this poha snack?
Always cook this easy 10-minute poha snack on low to medium heat. High heat will burn the outside while leaving the inside undercooked. Low to medium flame for about 3 to 4 minutes per side gives you an even golden colour and ensures the snack is cooked through perfectly.
9. Can I add other vegetables to this poha snack recipe?
Yes, this poha snack recipe is very flexible. The base recipe includes onion, capsicum, tomato, green peas, ginger, green chilli, and coriander, but you can easily add grated carrot, finely chopped beans, or even corn based on what is available at home. The key is to keep the vegetables finely chopped so the batter holds together well.
10. Can this poha snack be made ahead of time?
This easy poha snack is best enjoyed fresh off the tawa when it is at its crispiest. However, you can prepare the batter ahead of time and store it in the fridge for a few hours. When ready to eat, just give it a quick stir and cook it on the tawa. The texture is best when served immediately, as the crispiness does soften a little over time.